
How to Install Motion Sensor Light in a Bathroom?
Installing a motion detector light in your bathroom is an easy task that can be done by almost everyone. All you have to do is to invest some time and effort, and you’ll upgrade your bathroom in no time. That way you’ll stop your kids from leaving the light in the bathroom, and at the same time, you’ll also save on electricity consumption. In this article, we’ll talk about how you can install a motion sensor light in your bathroom. Let’s get started!
How to Install Motion Sensor Light in a Bathroom? First, turn off the power at the service panel, find the junction box, wire the motion sensor light, and install it on the ceiling by following the manufactures manual. Lastly, set the rules on the motion sensor light for turning on/off. Test your motion sensor light by using a “test” switch.
Installing a motion sensor light in a bathroom is a very simple task. Before setting up the sensor, be sure to turn off the power in your home. This way, you will be able to set up the motion sensor safely and without too much stress. However, if you have never done this and think it will be a problem for you, do not hesitate to call a professional electrician.
Note! Keep in mind that this task requires around 30 minutes from start to finish.
You want the motion detector to automatically perform:
- Turning on light when someone walks in
- Turning off when person leave the bathroom
- Stay on while the shower/toilet is used
Two Options For Motion Sensors:
If you doubt whether to buy a dimmer switch or bulbs, my recommendation is to opt for a dimmer switch. These switches start at 0% and then go up. When it comes to bulbs, they will always start with the brightest level before turning them to the desired brightness.
The next step is to program your control system. For this, I recommend using the Webcore app. If you haven’t used it before, you may need some time to learn all the features. But it’s not a difficult process compared to what you get.
When setting up system control, you must first determine the “night” and “day” range and match the on and off options. I recommend that you buy a motion sensor that can sense light levels. This type of sensor is not expensive, and it is very helpful because it determines when the light should turn on according to the level of natural light.
Switches with built-in motion sensors that have non-smart, and Z-wave, are also available on the market today. Personally, I use Z-waves systems that have a “dull” model that can work without the help of a hub. These models do not have a built-in light sensor, but their speed of reaction is commendable.
How Do Bathroom Motion Detectors Work?
Motion detectors work on the principle of a small electronic pair of eyes that use infrared technology to read a heat source that is in motion. When the motion detector detects the movement of a warmer object in its area it immediately activates the light. The motion sensor can be triggered by humans, animals, cars, etc.
If you want to learn more, be sure to read How a Bathtub Works? Plumber Explain
Places to set up the Motion Sensor in Bathroom

If you think you will have a problem installing a motion sensor light in the bathroom, don’t worry! We bring you the 5 options where you can put motion lights in your bathroom:
- Motion sensor at the door frame, just outside of the bathroom
- Motion sensor in the bathroom. Just above shower curtains that are in IR reach.
- Placing motion sensor in the right top corner of the bathroom.
- Rasp Pi w/home assistant + Humidity sensor is installable only in non-shower bathroom
- Hue Outdoor sensor for the working shower is installable with indoor sensor for rest of bathroom.
Keep in mind that the most common problem with motion sensors is if they are installed near the bathroom doors. A sensor placed near the door will turn on the light even when someone just walks past the bathroom door. This problem can be solved by adding an Eve door sensor to the system, which allows the light to be turned on only after the person has entered the room.
I used the Apple Home app, and I programed the settings on it so that the function does the following:
- TURN ON the light when motion is detected.
- TURN OFF the light when no motion is detected (but the doors are open).
- Do nothing when there is no motion (doors are closed).
This way, my bathroom system now works great, and we no longer have to wave with hands to keep the light on when we use it. The lights are activated upon entering the room and remain on while the bathroom door is closed. System options now can also eliminate the need for a timer that activates after the sensor stops reading motion. The lights are simply turned off by the movement of the door, which is great when you use the bathroom for just a few moments.
Installation Steps For Motion Sensor Light in a Bathroom
Now that we’ve explained where you need to install motion sensors in your bathroom, we’ll now explain the installation process on how you should do it. So let’s go!
1. Turn off the Electricity
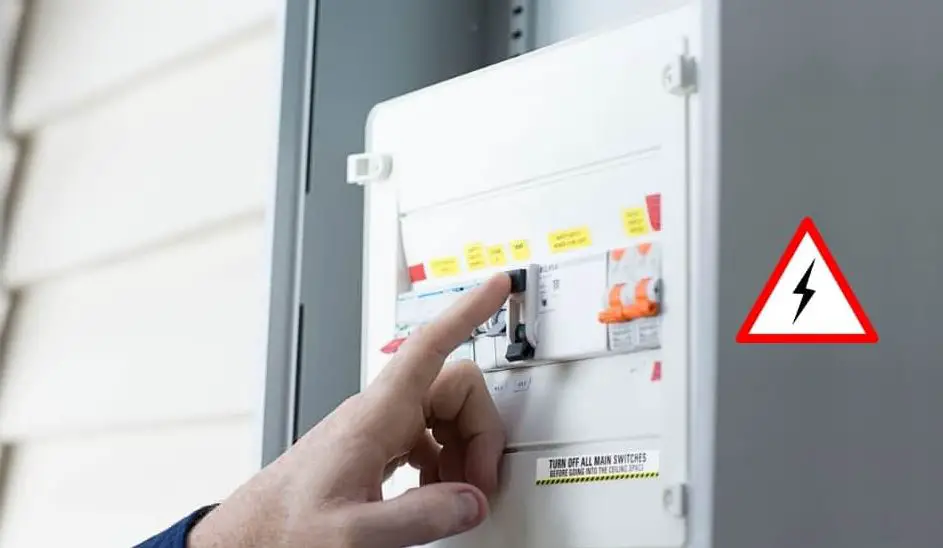
- In the central panel in your home, turn off the power for appliances and then test the wires to be sure that the electricity is off.
- Use a voltage tester (multimeter). Make sure that there is no electricity in the circuit before you start working.
- If the voltage tester lights up, then the power is still on. Be sure to turn off the right circuit at the main panel.
Note! A voltage tester is a great small device that allows you to measure voltage without touching the inside of the wires. Since I’m an electrician, I always carry it in my pocket. I recommend it as an ideal tool for any craftsman who often encounters electrical wires and cares about safety. In addition, this device is not expensive and can be easily purchased.
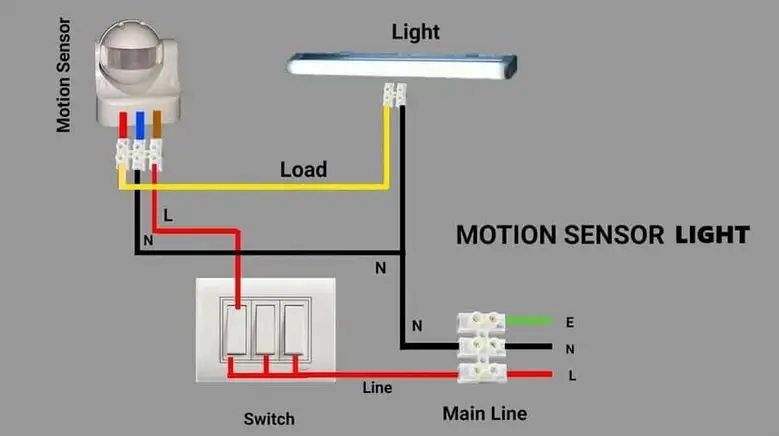
2. Wiring the Motion Sensor
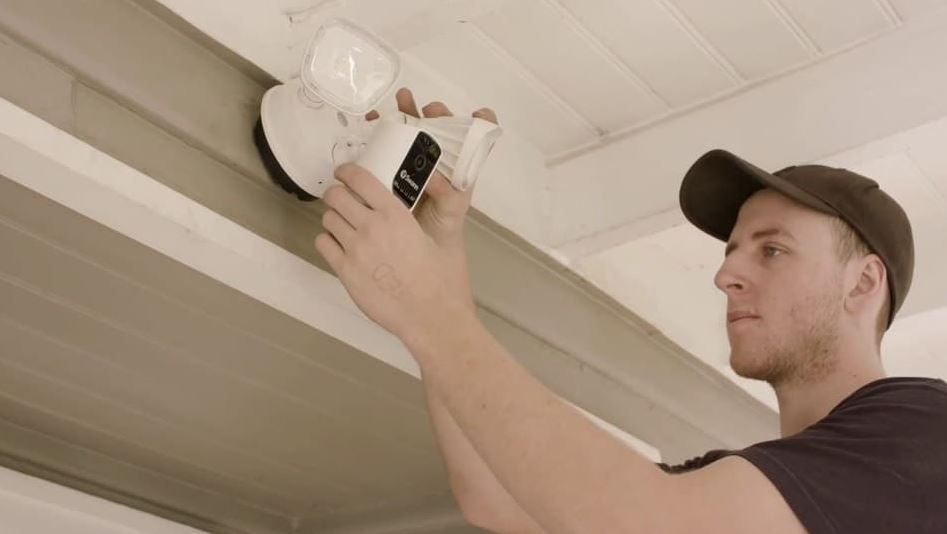
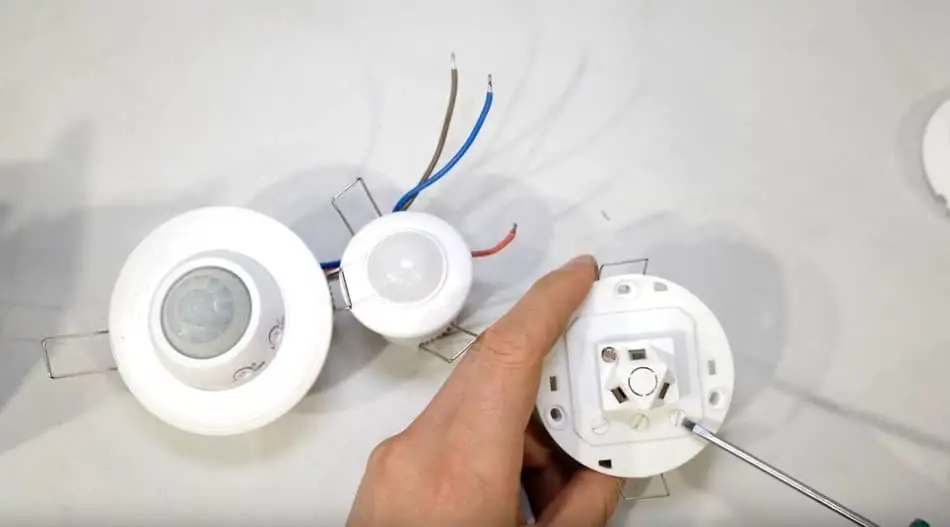
- Mount the motion sensors by following the manufacture’s guidance.
- Run the cables of the motion sensors through the rubber gasket.
- Attach neutral (white) wires, burning (black) wires, and ground (bare copper or green) wires with cable connectors.
Connect the wires to each other using cable nuts. Although it is not a rule, all black wires usually go together and white wires join together.
In a situation where there is a set of wires of different colors in the system, one should find at least one black and one white wire connected to the light installation. When there is a ground (green or bare copper) wire in a set of light wires, it joins to the identical wire in the box. But if there is no ground wire in the box, it needs to be attached to the console.
Whichever approach you choose, you will not go wrong. You only need to ensure that the system is grounded if there is a ground wire in the box. Each cable nut must be tested separately by holding the nut in your hand and carefully and firmly crossing down the wires.
If you’ve arranged something wrong, it’s better to spot it at this point than later when the wires are already in the box, and you can’t see them. Therefore, it is important to always connect all the wires according to the instructions and then adjust everything needed for the bulbs.
3. Test Your Motion Sensor System

Once you have connected all the wires, there is a possibility that the light will not turn on immediately. this is usually the case if you have done the job during the day. But don’t worry. Most lamps have a “test” switch where you can turn on the light even during daylight to see if it works.
After you have checked that everything works well, turn off the “test” switch option and return to the starting position in the settings. Most systems offer several different light placement functions. With their help, you can determine how long the light will stay on after the sensor detects movement and at what intensity the light will turn on. This way, you can avoid turning on the lights every time your cat enters the bathroom.
4. Set the Controls

- Now you need to set the rules for your motion detector. You can always change them later if you opt for something different.
- Lastly, set the timer shutoff switch. The best is to choose automated shutoff after one, two, five, ten, fifteen or twenty minutes.
That’s it! You just managed to successfully install a motion sensor light in your bathroom without calling an electrician for the job! The estimated time for this job is about 30 minutes. We believe it is a great feeling when you manage to do the work that makes your home more comfortable to live in.
My Experience With Setting Up Motion Sensors
In my bathroom, I use to combine three different Lutron switches (not Caseta).
- The first one is a motion sensor/dimmer w. I installed it on my bathroom ceiling to turn on automatically at 50% in a dark environment. It also turns off the light automatically.
- The second one that I used is a fan controller with a built-in timer. This device is awesome. It can be customized from 5 to 60 minutes. Personally, I set it to a 30-minute program for switching on. It can be activated by double-tapping the switch sets.
- The third one I installed is a simple plain switch to control the mirror light pole. It works on a manual on/off set up.
The first two options proved to be an excellent choice and made the system far more programmable than I expected. It was definitely worth studying the manual and finding out how to set up various sensor functions. Also, Lutro Claro plates is a great system that is easy to operate, use, and it looks great.
The one I installed in my former house had neutral, live, and earth that was taken from a junction case in the loft to power the unit. As usual, the two switch cables current were attached across the relay. It is a great system if you set it up well. It took me around 8 minutes to set it up.
I set the system so that I could enter the bathroom quickly and that my son could do the same when he was in the toilet. Remember that fitting of light #1 provides light instantly thanks to the halogen 40 watts “low energy” system. Fitting of light # 2 achieves the highest light level without costing the earth thanks to the CFL system. I can freely say that this is my favorite modification in the house.
If you are interested in more tips about your bathroom, be sure to read How To Fix a Hole In a Bathtub?
Final Thoughts
At the end of this article, I hope that by following the instructions in this post you were able to install the motion sensor light in your bathroom on your own. As we have already mentioned this is a very simple process. For this installation process, you’ll need around 30 minutes to get the job done. If you need additional information on this topic, feel free to contact us with a question in the comments.