
How To Install A Wood Stove In A Garage? (Complete Guide)
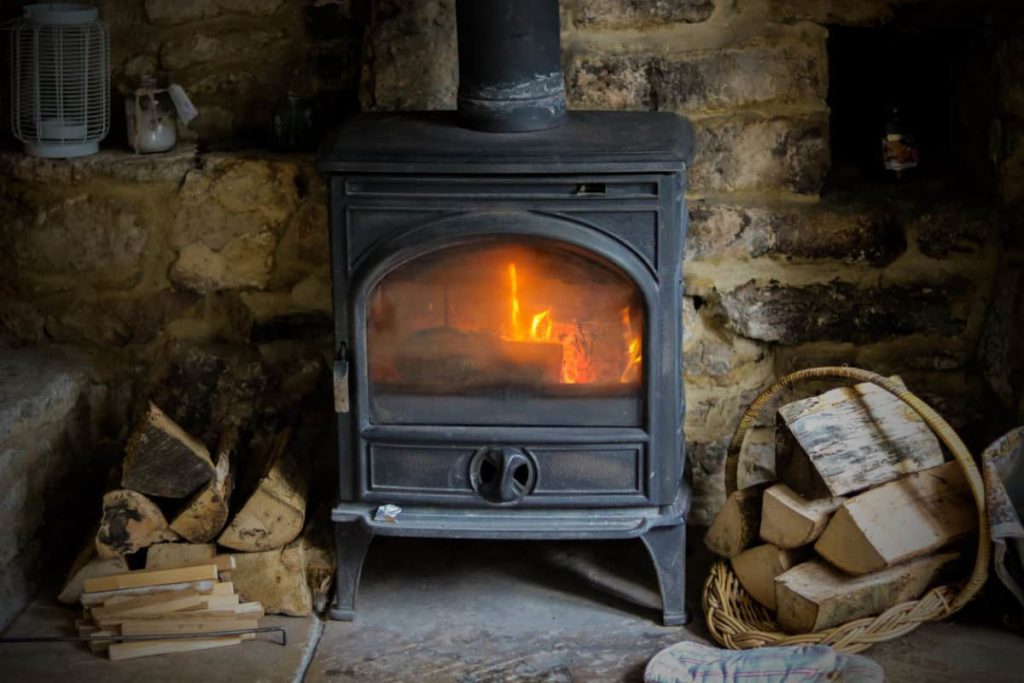
A garage is a space that is most often used to park a car, but it can also be used for other purposes, such as a workshop or an additional room where you can spend some time. However, the garage is a part of the house that is not heated, and the temperature in it is drastically lower than in the rest of the home.
One of the solutions to fix this issue is to install a small wood stove in it. However, the installation process is not so easy, especially if you have never done DIY projects. In this article, we’ll guide you on how you can install a wood stove in your garage. So, let’s start!
How To Install A Wood Stove In A Garage? First, purchase a wood stove that matches the garage’s dimensions. Mark the location on the roof where the ceiling pipe will be installed. Cut the roof sheathing and the ceiling sheetrock. Connect the chimney and make sure that the walls around the stove have fireproofing materials installed.
Adding a wood stove to your garage will improve the comfort of the space, giving you an additional reason to stay in the garage even more. However, most people think that this is too complex a job and that it is best to contact a professional for this. But if you are a person who is familiar with DIY projects, we have a step-by-step guide for you.
How To Pick The Right Wood Stove For Your Garage?
Picking the right model for your garage is very important for several reasons. One of them is to get the best possible energy efficiency. Besides that, there are also other important things to consider, such as the garage’s dimensions, the roof’s material, and the wood stove’s size. Let’s explain why:
- Consult with a professional. The first step before you decide to install a wood stove in your garage is to consult with a professional about whether it is possible to install such a stove in your garage.
- Take the dimensions of your garage. The next step is to measure your garage’s dimensions so you can choose the most optimal wood stove for that space.
- Don’t buy a wood stove that is too big. In this case, bigger and stronger is not better. If you take a wood stove that is too big, you increase the risk of fire in your garage, which you certainly do not want. Even small models of these stoves are enough to heat the garage to the desired temperature.
- Find a place where you will install it. This is also an important factor to consider. There are stove models that can be placed in the corner, and there are also those that can be placed in the middle of the room. Therefore, pay attention to that.
If you want to learn more, be sure to read Is It Safe to Use a Propane Heater In a Garage? Explained
Step-by-Step How To Install A Wood Stove In A Garage
Now that you know what kind of wood stove you need for your garage, it’s time to install it. Keep in mind that if you have never done this before, you might need some help. So be sure to invite a neighbor or friend to assist you. Now that we have solved that, let’s start with the instructions on how to install a wood stove in a garage:
- Step 1: Find the suitable place where you want to install your stove and make sure it fits perfectly. By choosing the wrong place, it is possible that you will not get the full efficiency of the stove. Measure the chimney system’s ceiling with the roof penetration. Be sure to check that the stove position meets the manufacturer’s requirements and that the walls are not flammable.
- Step 2: Mark where the chimney opening will be on the ceiling. This can be done by drawing the line. The best way to do this is to use a plumb bob over the center of the chimney’s connection.
- Step 3: Use a scribing compass. With the help of the compass, you can make a circle where the chimney section will penetrate the ceiling, together with the roof. Make sure to add additional 4 inches to the diameter, so you can have an additional clearance for combustible materials such as roof structure. This is a very important step for safety reasons, so do it correctly.
- Step 4: By using a jab saw (utility knife), cut the ceiling sheetrock. This will allow you to slide the metal chimney collar through.
- Step 5: Next, by using a jigsaw (or reciprocating saw), cut the roof sheathing and roofing.
- Step 6: Make sure to clear all the things around the opening on your roof. Install the chimney collar flashing on your roof by following the manufacturer’s instructions. Use the plumb bob lowered, so you know for sure the hole’s correct location.
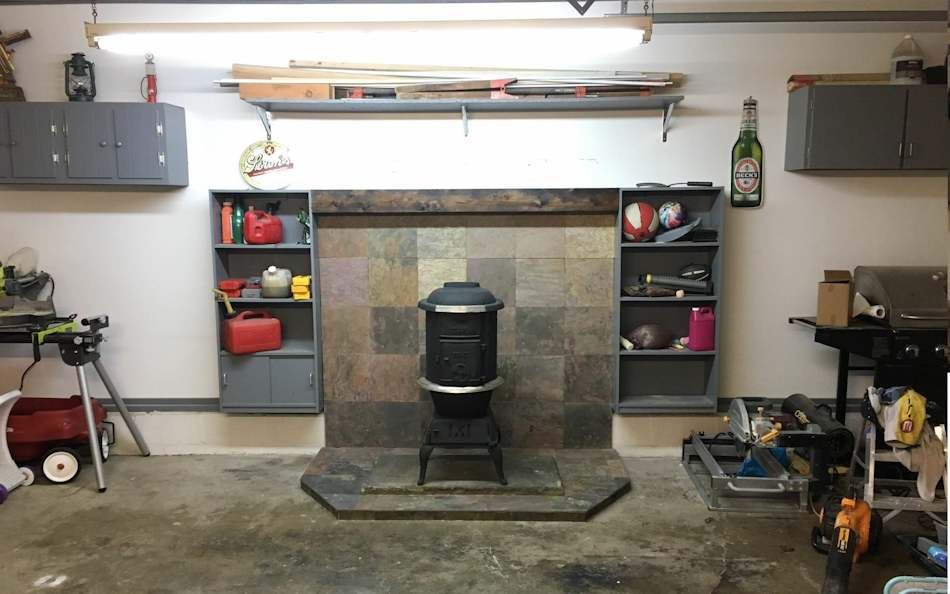
- Step 7: A concrete floor must be around 18 inches beyond the front edge where the stove’s door are placed. This can be done by using a framing square and aligning the tape measure.
- Step 8: The stove must be moved away so you can access the rear wall. Ask someone for help if you cant push it alone.
- Step 9: Use sheet metal to cover the walls behind the stove. This is for security reasons. The dimensions of this sheetrock should be around 48 inches on each side from the center line of the stove. In order to secure the sheetrock, simply use a screwdriver and screws to ensure it.
- Step 10: Next thing is to use a sheet of cement backer board. Place it around 36 inches high and make sure to center it horizontally with the stove. Lastly, by using screws and a screwdriver attach the wall framing with cement board at the height of around 8 inches apart on each stud.
- Step 11: Place the wood stove into its place and measure that everything fits perfectly.
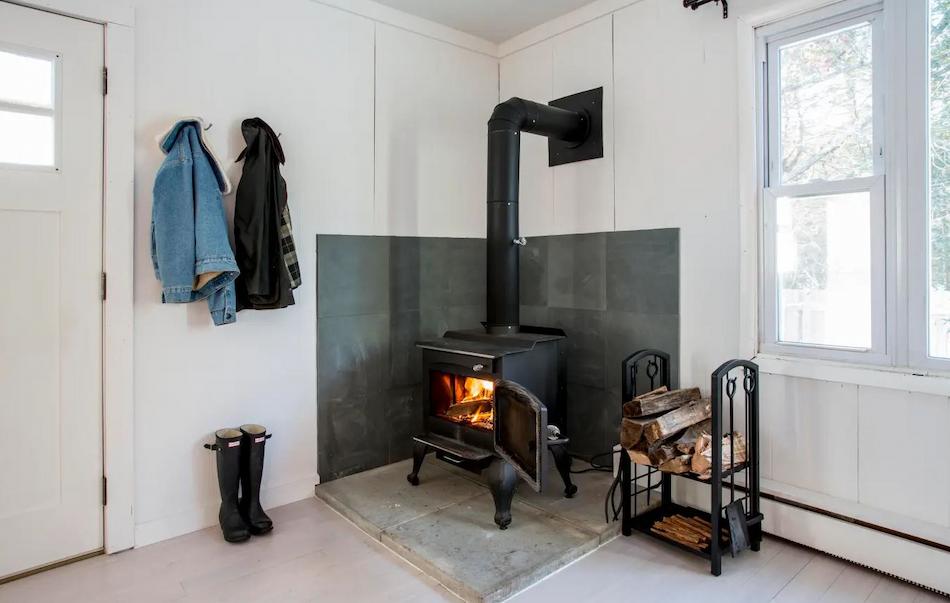
- Step 12: Make sure to connect the sections of the chimney. Joined chimney assembly must pass through the roof opening and collar flashing. The chimney needs to be attached to the stove flange by following the manufacturer’s instructions.
- Step 13: A storm collar needs to be installed over the roof collar. This can be done by using a ring of silicone caulk around the gap that is placed between the chimney’s vertical surface and the storm collar’s edge.
- Step 14: Next, a chimney cap needs to be installed. Cap needs to snap fully on the chimney assembly.
- Step 15: The Chimney flue must be opened. This is done by turning on the metal handle that is on the chimney. It’s typically around 5 feet above the floor.
- Step 16: Test your new wood stove. Light a small fire and check that everything is working properly and that there is no smoke leakage. If the smoke goes through the chimney completely, then that’s it.
Here is an excellent video that shows the whole installation process of a wood stove in a garage.
How Much Does Installing A Wood Stove In A Garage Cost?
The average cost of installing a wood stove in a garage is between $1,500 to $4,700. Keep in mind that this price includes a professional fee. Therefore, the price range will vary depending on the model of wood stove you choose. If you decide to install it yourself in your garage, you can save from $500 to $1,000.
If you have decided to put the stove in the garage, you need to have good insulation in your garage. To learn more about it, be sure to read: Should You Insulate Your Garage Ceiling? Explained
Should You Ask A Professional For Help?
Installing a wood stove in a garage is a very demanding and difficult job. Especially if you haven’t done DIY tasks before. That’s because you need to make a hole in the roof for the chimney, make precise measurements, and install the stove by yourself.
Although we can classify this as one of the more demanding household tasks, it is up to you to assess whether you can do it yourself or whether you will still decide to ask a professional for help. We also advise you to look at the building codes in the area in which you live to make sure that you are doing everything according to the regulations and the law.
FAQ: People Also Ask
Does Installing a Wood Stove In A Garage Increase Home Value?
A wood stove will definitely add value to a house. However, this also depends on a future buyer. Usually, homes that have fireplaces such as a wood stove can increase a property value by up to 5%.
Can A Wood Stove Be Installed On A Plywood Floor?
No! You can’t install a wood stove on a plywood floor due to safety reasons. A wood stove needs to be installed on a fireproof floor. Easily flammable materials such as wood must not be near the stove. The best option would be to have a concrete floor installed.
Can Wood Stove Warm Up The Garage During the Winter?
A wood stove can easily warm up a garage or any other room in the house. Having a stove in a garage can easily warm up the room even in the coldest winter. However, proper insulation of a garage is also important.
Final Thoughts
Having a wood stove in a garage will surely bring more benefits than you initially thought. People who often stay in the garage decided to install a wood stove because it is the most profitable solution to keep the garage warm during the winter. However, the installation of a wood stove is not so simple, and we recommend that you contact experts if you decide to have one. In this article, we have given you detailed instructions on how to do it, and it is up to you to decide whether you want to embark on this endeavor. Good luck!