
How Do Security Camera Wires Enter A Home?
If you have purchased security cameras for your home, you have certainly encountered a problem: how to connect them? This is especially true for wired models. Even those who carefully read the installation instructions and watch recommended tutorials on YouTube often do not know how to run the wires. In this article, we’ll explain how to connect wired security cameras to your home. So, let’s start!
How do security camera wires enter a home? Security camera wires enter a home through the exterior walls (usually from a soffit). Wires need to be twisted and threaded to avoid snags. To have tight fits, fishing wire and electrical tape help to pull the wires through. Lastly, wires need to be connected to the DVR or NCR and then to your camera system.
The holes need to be waterproofed after running the wires through your home walls. That is done by using silicon. Otherwise, you may face damage that is not cheap to repair, which is caused by the penetration of moisture accumulated on the surface of the cables in the connection points.
For a quality installation, you must also have a good plan that should include several factors. Appropriate tools and equipment are required for this task. Therefore, you should think about the ideal location for installing the security camera and how to perform wiring without damaging existing electrical installations.
If you want to learn more about home cameras, be sure to read Can Security Cameras Be Jammed? Expert Explain.
5 Steps How to Wire a Security Camera
We know that when you read the instructions in the manual, the procedure is usually very simple: place the bracket, make the holes, set the camera, and connect it. However, the manual does not have all the answers that you need for this process. To avoid getting stuck in a chair looking for a solution on Google, below I bring you five basic facts that will help you.
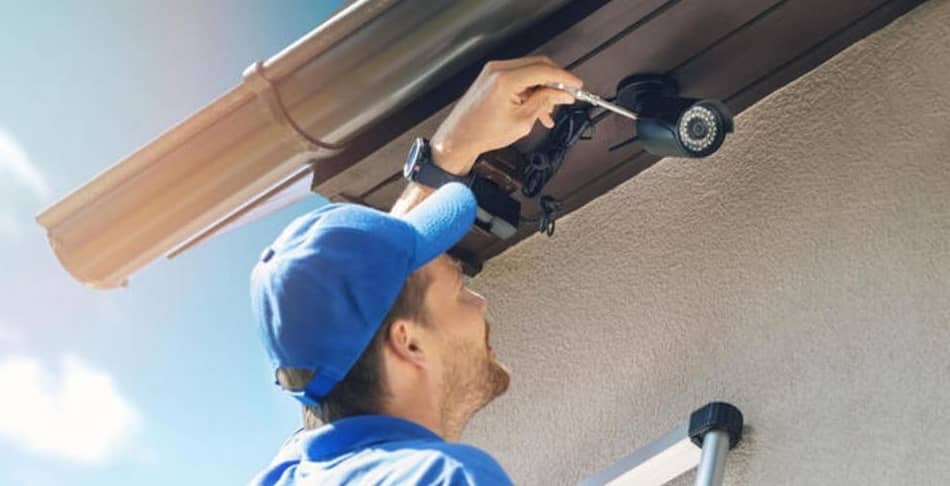
Step 1: Prepare The Location For Setting the Cameras
- The first step is to mark the location where you will run the wires so that you can connect the security camera with the DVR box, Video Recorder, and a power source.
- Next, be sure to measure the wires and cables. This is very important! You have to know the right length so you can have enough space to use cables and multiple wires for your system.
- Now, make sure to test your camera system before installing it.
- Choose the spot for every camera so you have a clear view. They should be installed around 10 feet high in order to protect the devices against vandalism and other elements.
- Your home power supply needs to be turned off before the installation process starts.
- Lastly, ports on your cameras need to be labeled. This is important because you’ll have multiple cameras in your input system.
Step 2: Find the Spot to Install Security Cameras
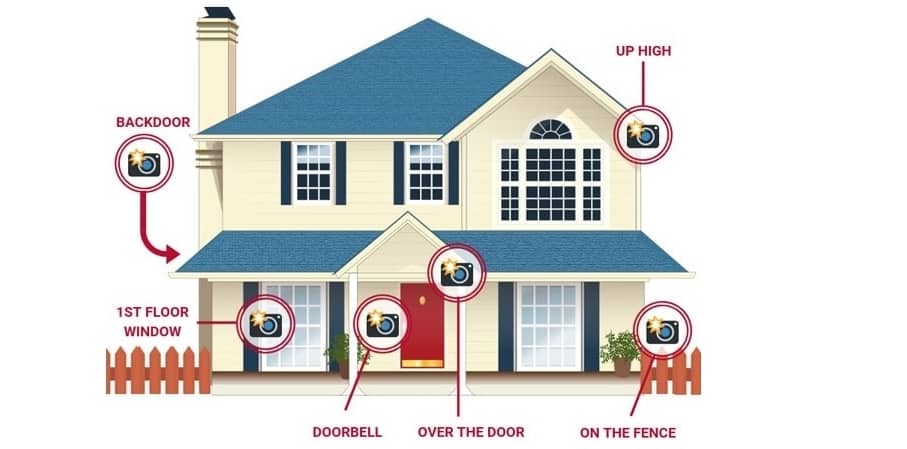
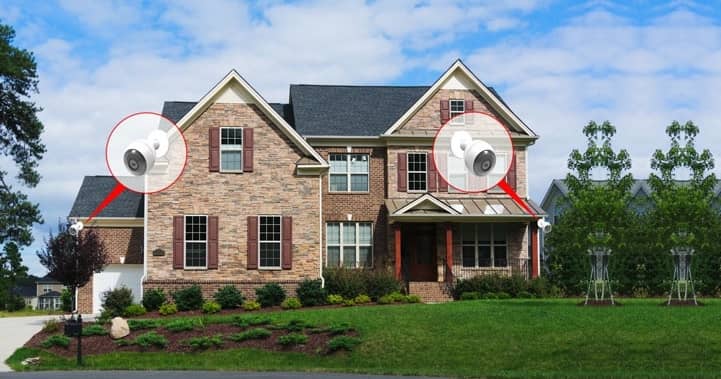
The first step is to mount your security camera on top of the front door. That way, you will always see who is at your door, and you will never miss packages. The camera on the front of your house will also show you any attempt to enter your house, including unwanted ones, like a trespasser.
A good position for the security camera is also above the side, or rear entrance to the house since burglars usually operate in hidden nooks. Good locations to set up the camera are also above the garage, in a location that has a direct view of the driveway and yard, and near windows facing the street.
When it comes to the house’s interior, it is recommended that the cameras are placed in rooms where family members spend most of their time, such as the living room and kitchen. This way, you will easily monitor the activities of your pets, children, guests, and babysitters. It is also good to place the cameras in the corners above the stairs and hallways. When the cameras are installed, the movement of people around the house can be recorded from several angles.
Step 3: Find Right Angles When Installing Security Camera
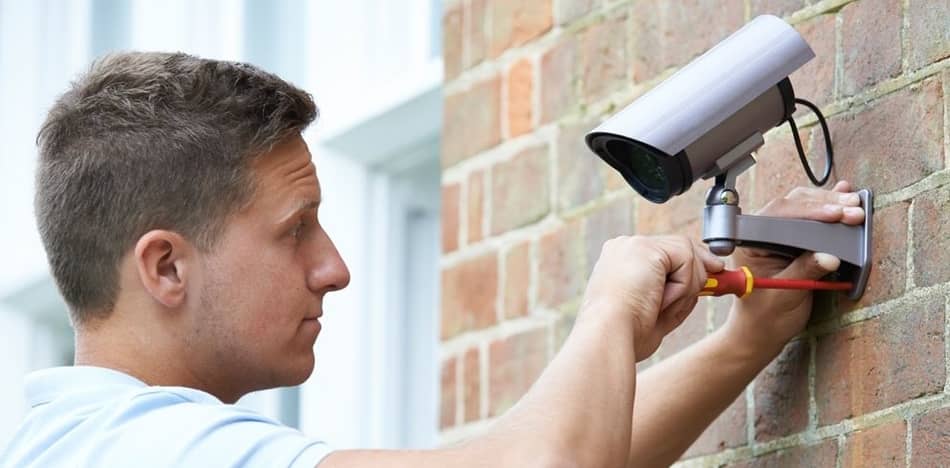
This is a very important step! The security camera must be placed at an angle so that the sun is not affecting the recording. Also, the camera needs to be protected from bad weather. If you set the security camera so that the sun illuminates it, its images and footage will have a glare. Wires need to run through a hole in the exterior wall and then attach by conduit or running it in the attic. Either way, the camera should be placed in an area that is sheltered for protection purposes.
Use a cable run to secure wires that are exposed to potential intruders. Cameras that are set up to expose passers-by can be intimidating, but they can also be an easy task for burglars.
Some people put security cameras in wired casings or install fake cameras to deceive burglars about the location of the real camera. What we do not recommend is installing the camera in the gutter. This is an unnecessary load for the gutter and at that location, the camera is likely to be hit by the bad weather.
When it comes to installing security cameras inside the house, it is known that wires are placed under carpets and baseboards, especially if they are located near the front door or in a room in the house that is used intensively throughout the day. To avoid problems with a reflection that is causing sun and street lighting, do not position indoor surveillance cameras so that they are too close to the window.
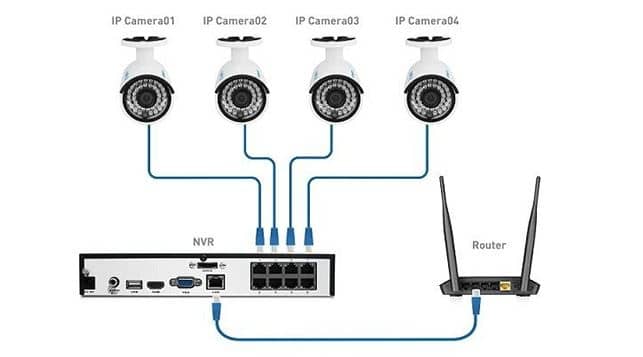
Step 4: The Location of Security Camera Hub
The central hub (this includes DVR, NVR/router, screen, and hard drive) must be near to a wiring accessible point, and not far from digital thermostats, automated door locks, and other gadgets which run on Wi-Fi.
The home hub determines where you must run cables and wires. It is wise to have a full home Wi-Fi tri-band system, a mesh network setup, or an extender for Wi-Fi that will boost the hub’s ability for managing numerous devices hooked on your Wi-Fi.
Step 5: Required Tools For Different Models of Security Cameras
When it comes to PoE system installation, CAT5/6 is required. It is used to transmit data, images, video, and power in one cable, close to 1,500 feet. For this, a good drill is required, drill bits, PoE injectors (due to long distance), and fish tape.
When it comes to an analog system, the Siamese cable is used as a standard of RG-59. That includes RG-59 connectors, stripping and crimping tools, coaxial wires, cable extenders, BNC barrels, wire cutters, and electrical tape. A regular power drill will be just fine for the standard drilling process. But when you have to drill through brick, then you may need a powerful hammer drill.
For more info, be sure to watch this YouTube video:
How to Get Audio on a Doorbell Camera?
Knowing how your system works is very important so you can react in time if something happens to you or doesn’t work properly. Especially when it comes to doorbell cameras like the model Ring video doorbell which is very popular. We bring you complete steps that you should try to do when the audio on your camera is not working.
- The router is placed too far from the doorbell. To solve this issue, move it a bit closer. It is supposed to work within a radius of 200 feet from the door. When you move it closer, you will also boost a Wi-Fi signal.
- The modem is outdated. The senior editor from Poc Network, James Hrenak Jr., says; “This may be a problem when two-way audio or other issues are symptoms of network latency occurrence and you use solid Wi-Fi setup”.
- Check your home voltage. Home ring doorbells operate on 16 to 24-volts. Also, make sure you do the right check-up of the volt-amps. You can do that using the option ‘device health’. Try to switch to a 30VA unit when it is underpowered.
- Your iOS device has no audio. On the Ring, the app tries out the microphone. Then you should go to “Settings” on your iPhone and select Privacy/Microphone and activate this toggle button. However, be sure to check if your speakers work well. See if the audio is activated. You can find more tips on this subject in a picture accompanied guide on fixing doorbell speakers.
How To Run Security Camera Wires Outside the House?
If your home security system needs to have wires outside the home, there are several ways how you can do this. Along the edges of the house, gutters, or walls, you can place wires intended for outdoor use and pre-waterproofed. They have adequate protection, usually visible from the manual that came with the device.
If only unprotected wires are available, you must first coat them with material so they are protected from bad weather. When planning to lay wires underground, it is recommended to use weather shields and PVC pipes, and if you are worried that someone might temper with your wires, metal conduits are a good solution.
Take a look at the National Electric Code (NEC) to find specifications for situations when you are running underground cables. By going through this, you will find in one place all the data you need. Now you know what exactly to look for and how to successfully install a security camera. Also, it can help you with getting rid of that horrible doorbell audio.
Ways To Hide Security Camera Wires Outside
If you have decided to set up your home security system outside your home, below, we offer you a few tips on how to hide camera wiring. Here are the three methods that you can use:
Method 1: Wires must match the wall colour
It is a simple solution that is also very effective. Trim and connect the wires as neatly as possible and make sure they don’t get tangled. Then cover them with the paint you have on the wall next to it. This will improve home insurance, remove wires from potential burglars’ view, and make the whole story look neat. If you use a flat cable for this method, your wall-mounted camera will go unnoticed.
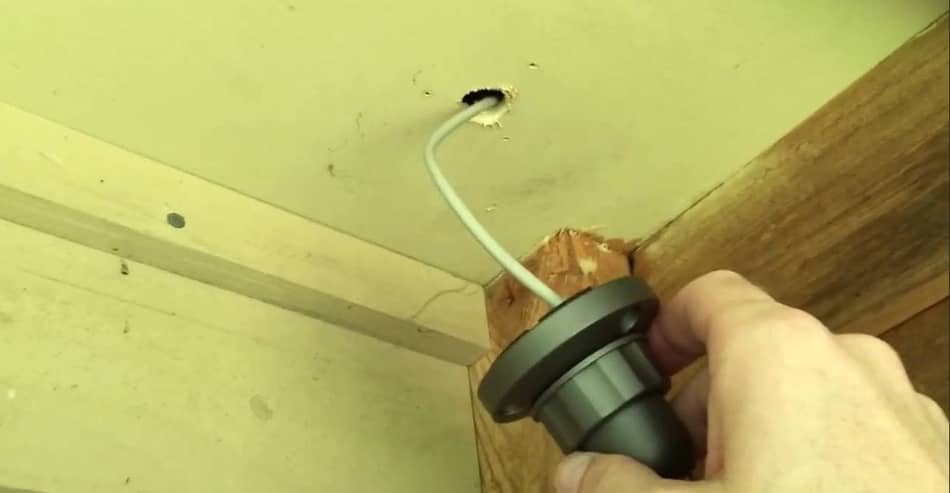
Method 2: Use false ceiling to hide the wires
If you have a false ceiling in the house, use it to hide security camera cables, and the camera will become completely invisible. Study the opening in the ceiling well and then pull the wires through it. It is even safer to hide the camera wires in the walls.
Drill a few small holes and that’s it. Be careful when you are drilling the holes. You don’t want to damage walls. Keep in mind that this option may require the installation of a DVR or power outlet on the outside of the wall.
Method 3: Route the cables underground
Anoteher option that you can try is to take the cables underground. But this is an option that requires a lot of work. It is the best choice if you can bury the cables while the house is still under construction. This avoids clutter, the cables are easily buried and remain safe for the long run.
Do you know Why Do Security Cameras Have a Red Light? If not, be sure to read this post.
FAQ: People Also Ask
How far away can a security camera be?
A security camera for the home purpose can see in the range from 0 to 70 feet, depending on the sensor, resolution, and lens used. On the market are also available professional cameras like high-resolution PTZs, which allow you to see further away. In this case, the distance varies from 0 to 700 feet.
Do outdoor security cameras need power?
Yes, all wireless security cameras to work need power. These device need electricity to operate, and it is common knowledge that without electricity they cannot work.
How do I power the outside of my house?
The best way to extend power to the house outdoors is to build-in a receptacle back-to-back in connection to one you have inside the house. Option is also to drill holes in the wall from a crawlspace or basement and then to attach a receptacle with extension ring on the one side of house wall.
Final Thoughts
As you can see, the process of installing a security camera is not that complicated and can be done very quickly. You just have to follow the instructions. Also, pay attention to where you will place the camera and at what angle. I hope we have helped you with this article.